Mette Nielsen | 11/11/2024
Scheduling+ use case: Restaurant
In this article, we explore how a restaurant or cafe might use our new appointment booking tool, Mono Scheduling+.
Mono Scheduling+ is designed for service industries such as hairdressers, doctors, real estate, and fitness. However, it can also be adapted to work for restaurants.
In this article, we will explore how a restaurant could set up Scheduling+.
This example is intended to help you identify the best approach for your client. Use it as inspiration to develop a tailored solution that meets their needs.
Setting tables up as resources, and reservations as services
Let’s use Timify's resource section to set up each table as a bookable resource. Services are then configured to allow visitors to reserve a table.
Set up the tables
- Define each table as a resource.
- Specify the seat number of each table.
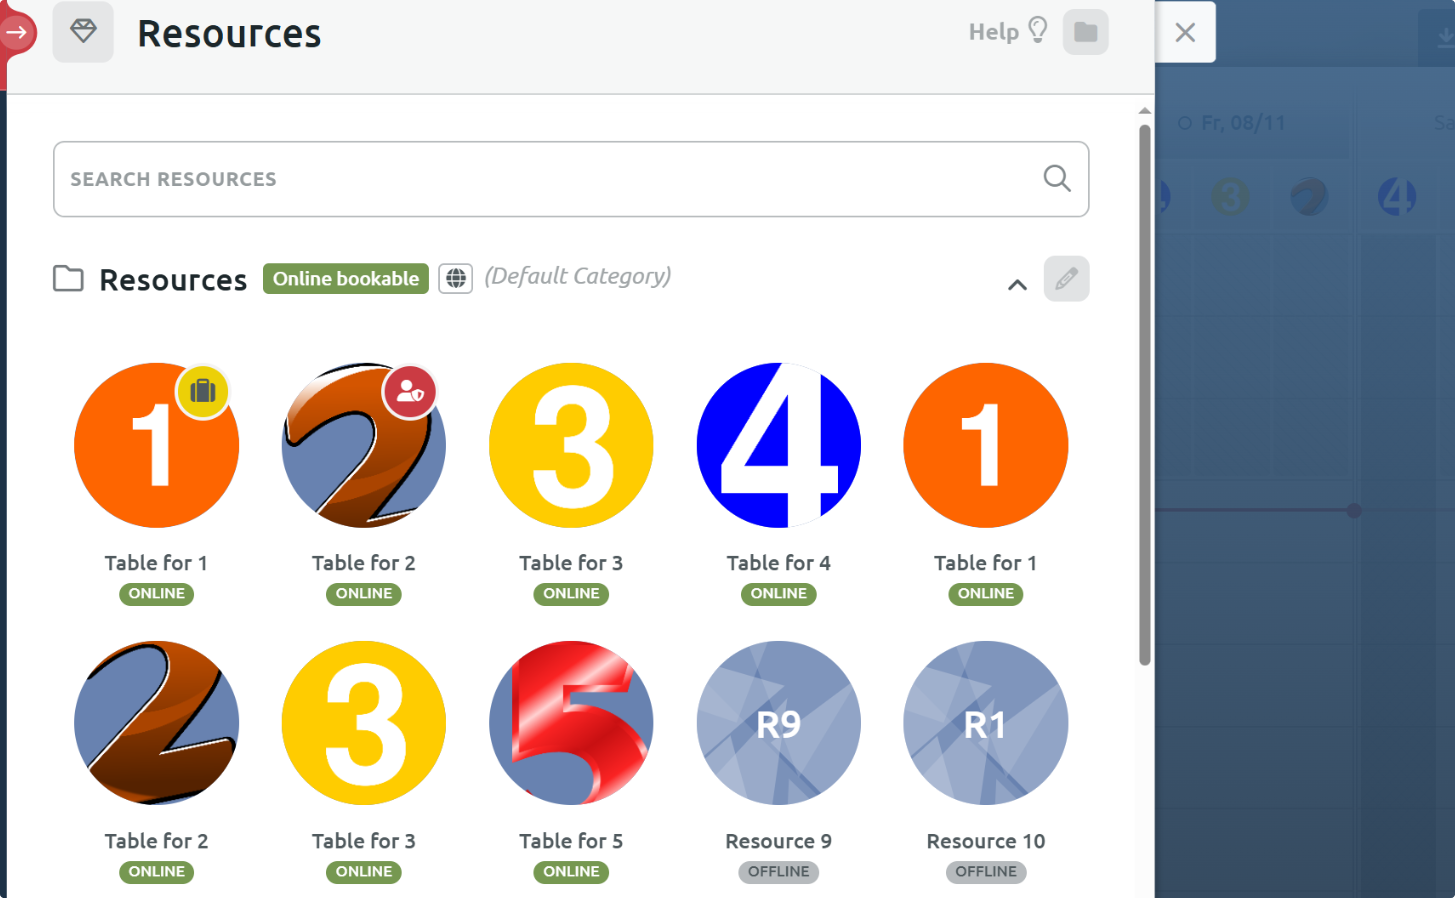
- Navigate to Management> Resources to set up each resource (table).
- Set the availability to the opening hours of the restaurant, for example 10:00 - 22:00.
- Tick the box ‘Activate resource for online booking.'
- Optional: you can also add more information, such as abbreviated names and thumbnails.
- Define each table by number of seats. Here are the resources we set up for this example:
- Table for 1
- Table for 2
- Table for 3
- Table for 4
- Table for 1
- Table for 2
- Table for 3
- Table for 5
- Note: In this example, there are multiple tables of certain capacities (e.g., two tables for 1 person, two tables for 2 people).
Set up the table reservations
Let’s use services to define the table reservations.
Service 1: Table for 1
- Navigate to Management> Services.
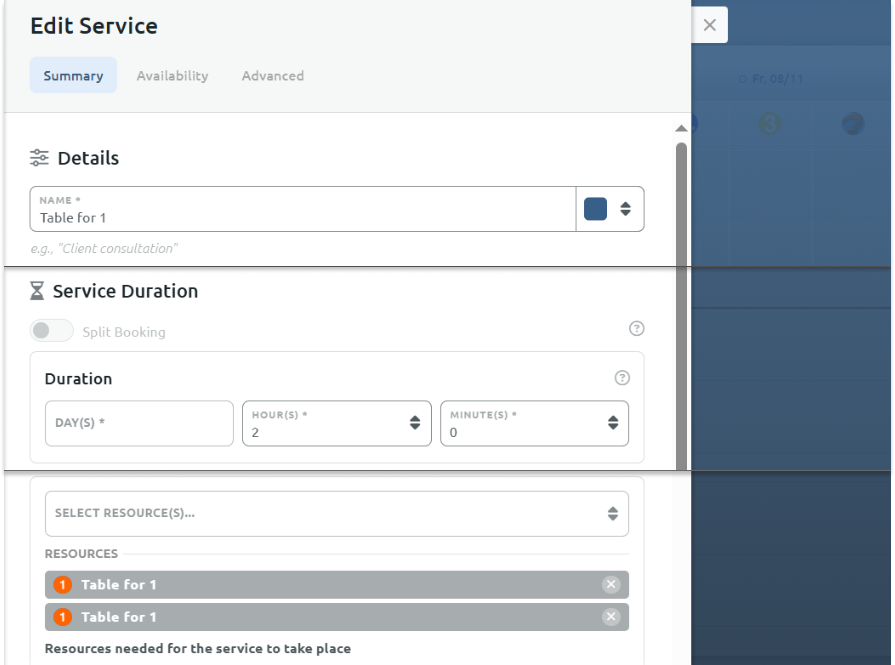
- Click the + icon to add a new service and call it 'Table for 1'.
- Set the duration of the service to how long the table reservation should last for, for example 2 hours.
- Choose which resources (tables) should be associated with the reservation. Let’s choose both of our two ‘Table for 1’ resources.
Service 2: Table for 2
- Navigate to Management> Services.
- Click the + icon to add a new service and call it 'Table for 2'.
- Set the duration of the service to how long the table reservation should last for, for example 2 hours.
- Choose which resources (tables) should be associated with the reservation. Let’s choose both of our two ‘Table for 2’ resources.
Repeat until you have a service for each available table type.
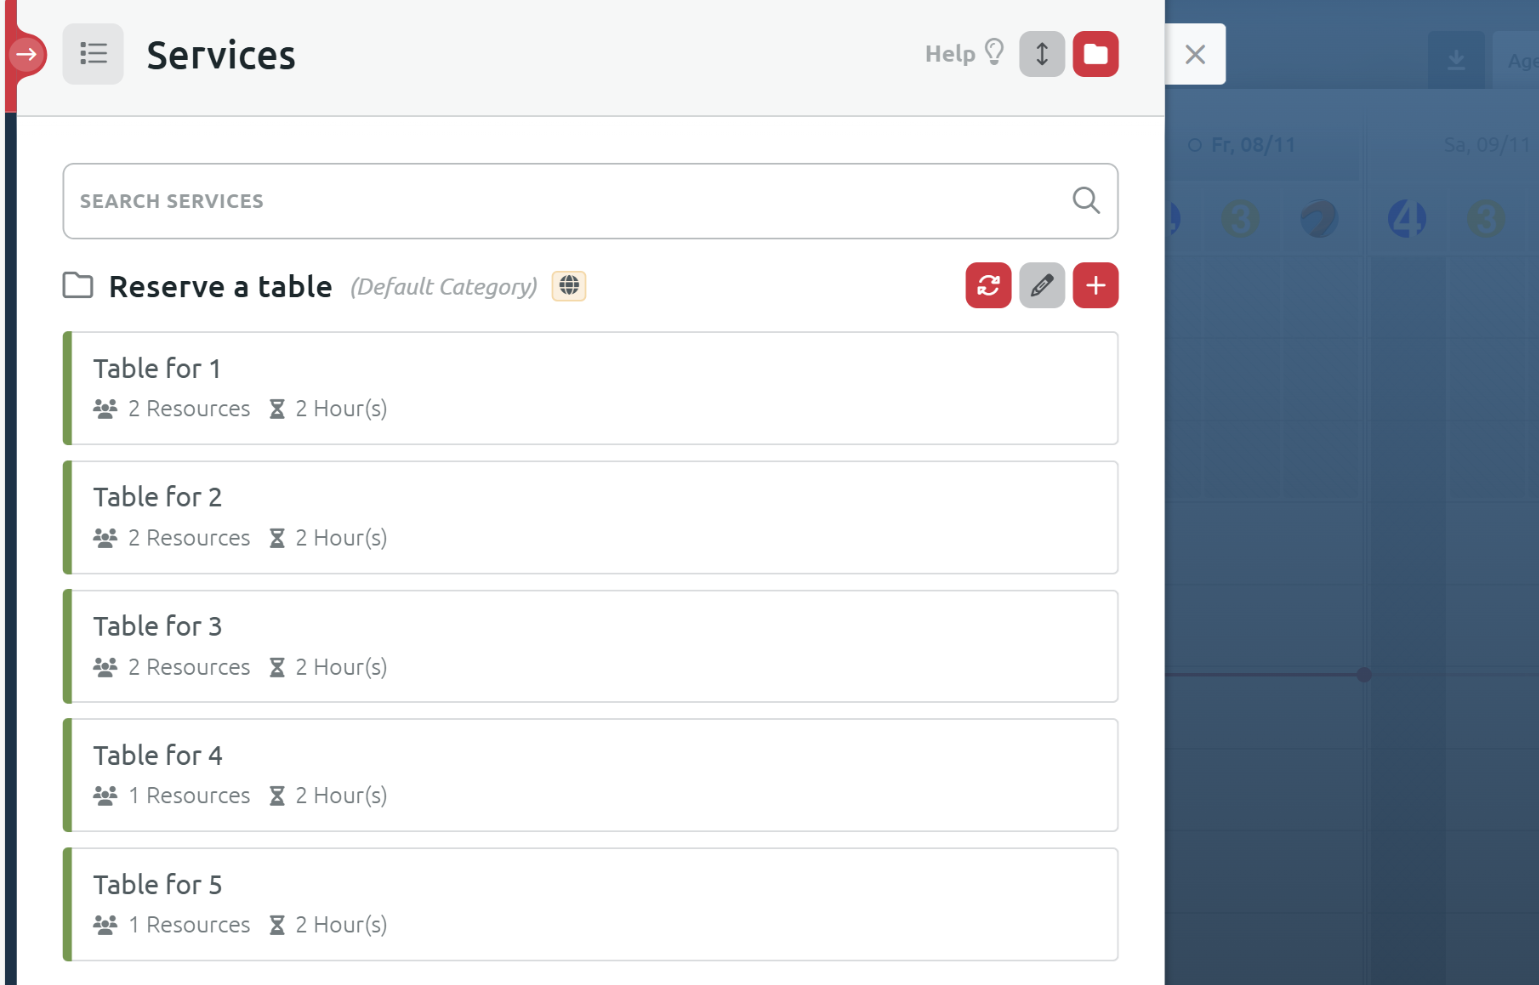
Rename the Service category
- Navigate to Management> Services.
- Click the grey pencil icon to rename the Service Category
- Rename to 'Reserve a table’ or a similar title.
- The category name will be displayed above the services in the widget.
Hide Resource Profile
- Navigate to Settings > Booking > Booking Widget.
- Toggle ‘Enable’ under Hide Resource Profile.
- This setting hides the individual resources (e.g., specific tables) from view, showing only the available services (e.g., reservation options). For example, if a customer selects the service "Table for 1," they will not see a list of all available tables. Instead, the system will automatically assign an available table, allowing for a smoother booking experience.
Add a custom data fields
Use Customised Data Fields to set up custom data fields in the booking form to collect additional details like asking the site visitor: How many people will show up?
- Navigate to Customers > Data fields.
- Go to the top of the data fields window and click on the "new category" button.
- Let's name our category "Reservation preferences".
- Add a new custom data field under your newly made category. You add data fields by clicking on the red "+" button.
- Give the data field a name, for example ‘Number of guests’
- Choose the data type you want, for example Text field (single line).
- Make sure to choose the right data field type before you save! You cannot edit a data field type once you save it. You can only delete the data field, and make a new one with the right data field type.
- Choose which services this data field should be visible for, for example ‘All’
- Make sure to toggle the Activate data field for the Calendar switch at the very bottom. This opens up more settings.
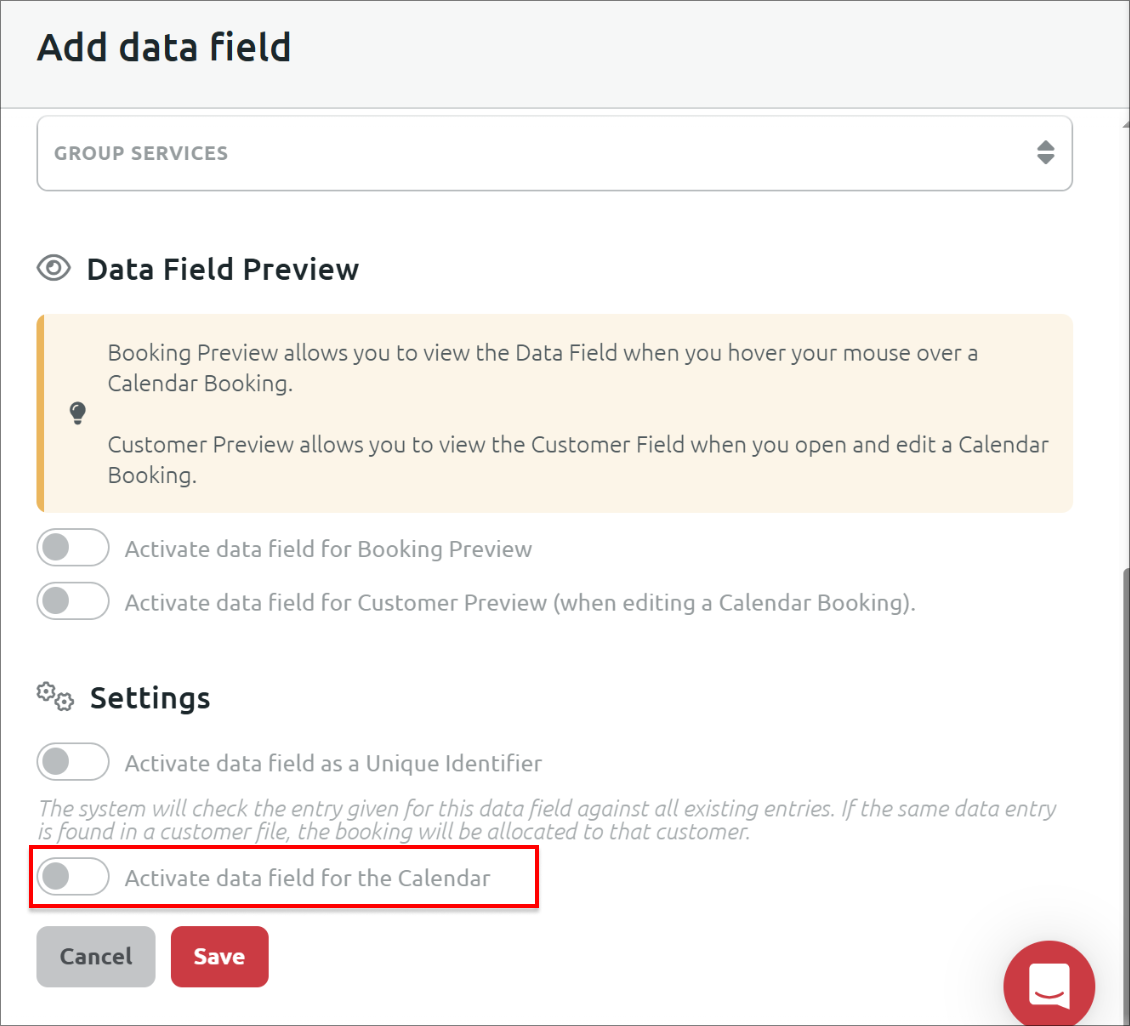
- Once you toggle this switch, more options become available.
- Make sure to toggle the Activate data field for the Booking Widget switch. This makes the data field appear in the booking flow.
- Once you toggle the Activate data field for the Booking Widget, you also get the option to display the data field before or after the booking slot selection, and you can also add a placeholder and description.
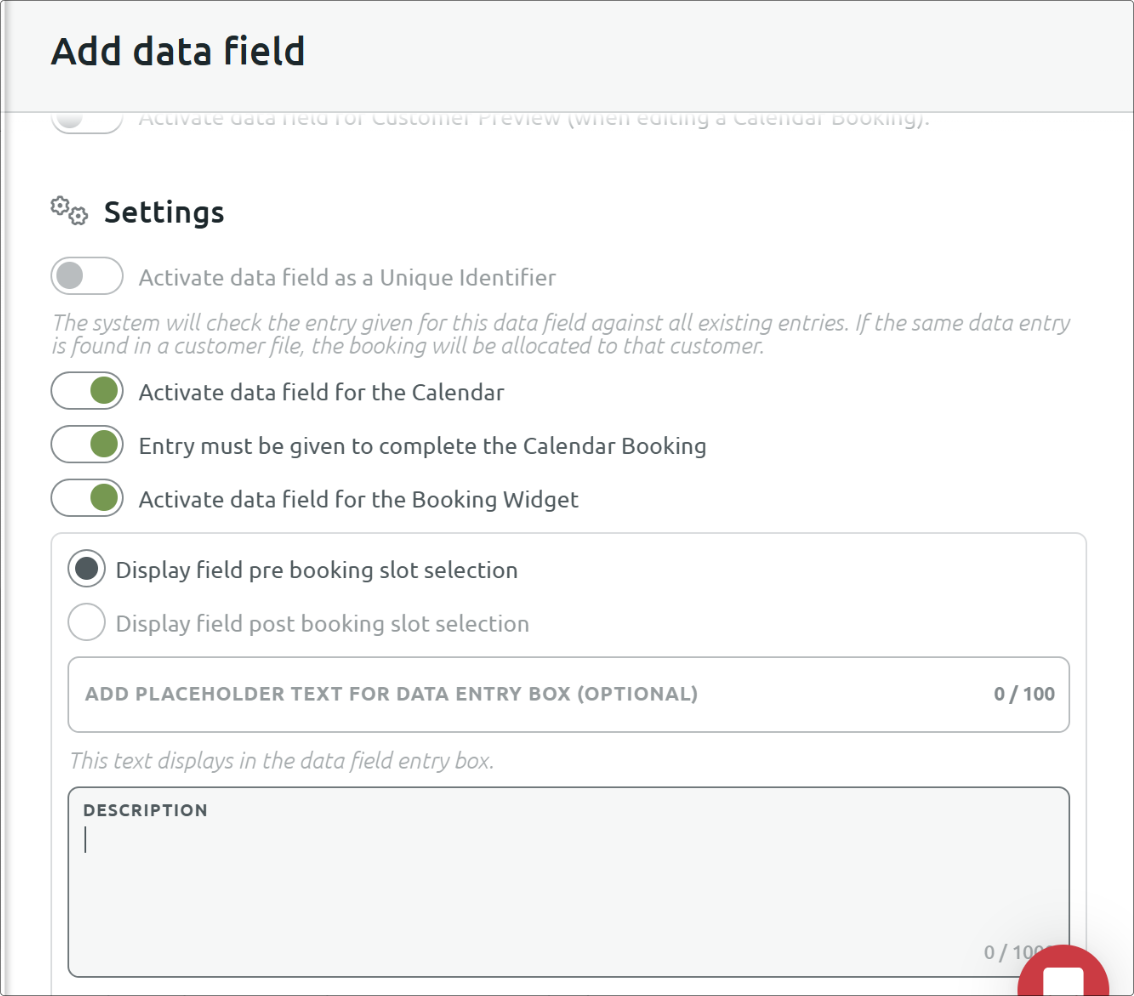
Create as many different data fields as makes sense, for example you could also add one for the customer’s address or dietary preferences.
The booking experience
Let’s take a look at the booking experience.
Click ‘Book Now’
The visitor begins by clicking the ‘Book now’ button.
Select a reservation type
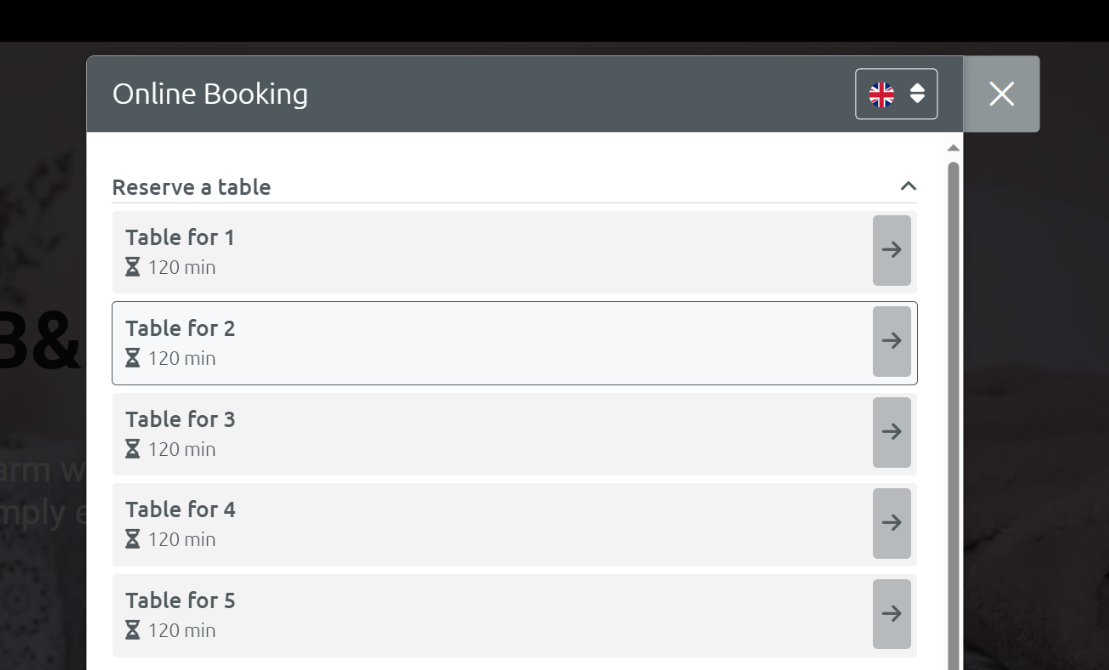
A pop-up appears, showing a list of reservation options (services). For instance, let’s choose Table for 2.
Resource visibility
Although there are two available tables that can accommodate two guests, the visitor does not see specific table options because we have chosen to hide resources. Instead, they only see that they can book a “Table for 2” if space is available. As long as any of the tables for two are free, the visitor can make this reservation.
Choose reservation time
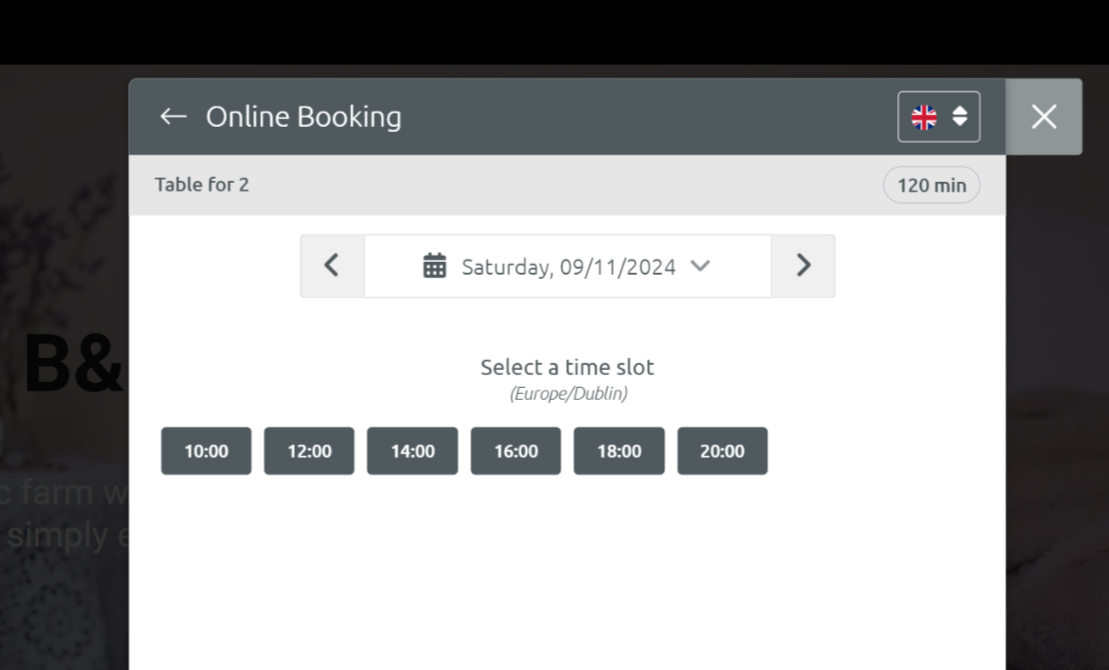
The visitor selects their preferred time, depending on the availability of tables.
Enter details
Finally, the visitor enters their details.
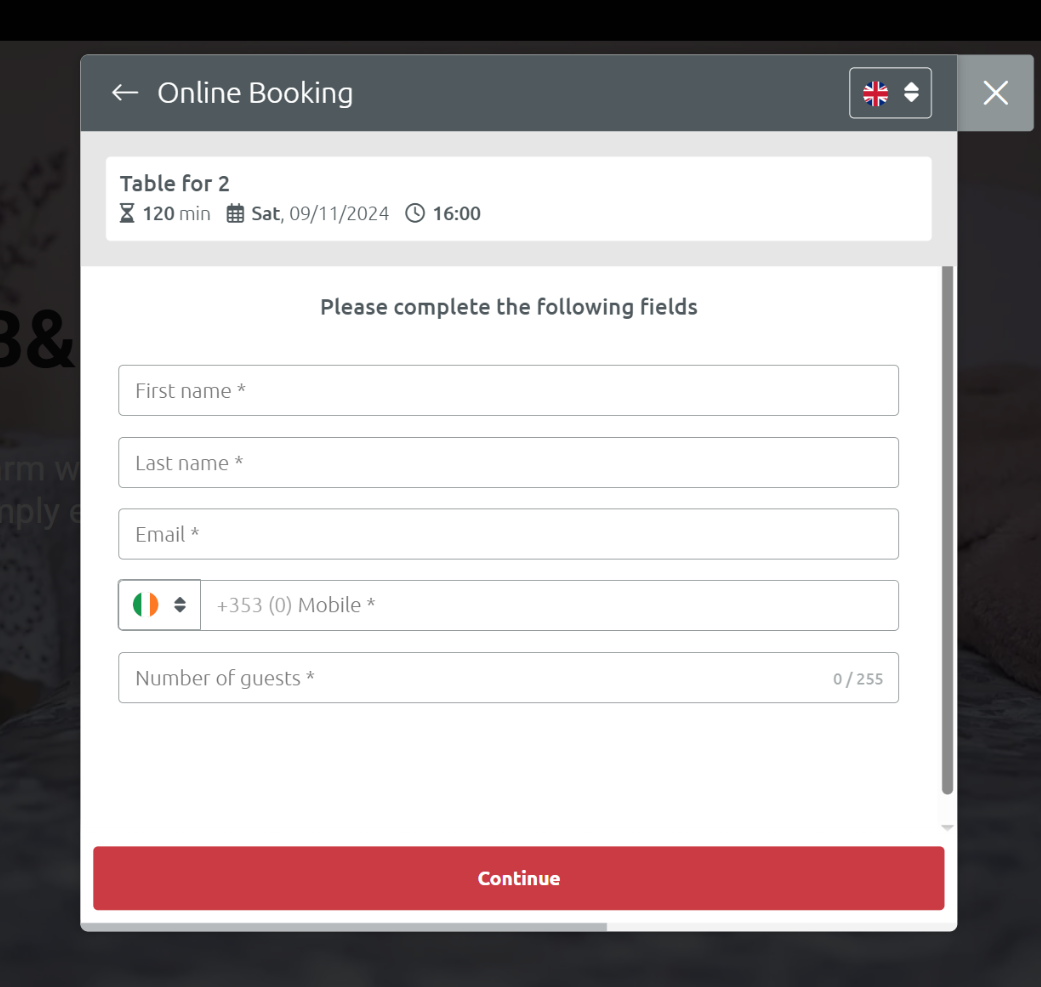
The visitor is prompted to answer the custom data fields. After this, they can confirm the booking.
Final thoughts
Although Scheduling+ was designed mainly for the service industry, restaurants can also make it work for them using this method.
If you are interested in trying out Scheduling+ for yourself, please get in touch with us at info@monosolutions.com or reach out to your Account Manager to get started.